

Google Search Console is a free service that will help to monitor as well as maintain a website's presence in Google's search results. It is not necessary to sign up for Search Console to show up in search results, but doing this will aid in better understanding of how Google views websites and how to optimize your website so that it performs better within the search results. Search Console can do so much for anyone who chooses to utilize it—it's great for business owners that delegate tasks, SEO specialists and marketers, website administrators, web developers as well as app developers.
Search console will help to monitor the website's traffic, optimize the ranking, and make advised decision about the appearance of the website's search results. The information found within Search Console will also be able to influence any technical decisions for the website, as well as perform marketing analysis alongside Google's other tools. Take advantage of website maintenance options so make sure that adjustments happen smoothly. It will also provide insight to app developers by allowing them to integrate the application effortlessly within a world of websites.

Getting Your Site on Search Console
It is possible to add up to 1,000 properties to your account, for both mobile applications and websites. These steps will get you started for using Search Console on your website.
You should make sure to add every variation of your website root URL. This should include both www and non-www versions, as well as all subdomain variations. When a website is added to the Search Console, it is then referred to as a property—this is for the reason that Search Console supports both applications and websites.
Next, you will need to verify the website. This proves that you are the actual owner of the website. Until it has been verified, you will not be able to access any data from Search Console. Sites that are hosted by Google (Blogger, etc.) are verified automatically. The verification does not affect PageRank or the performance of the website in Google's search results pages.
If your website hosts both www and non-www domains, you will need to specify which version of the website is canonical.
You will then be able to add or remove users that will be able to view your data. They will be able to read the Search Console data for the website, and they will be able to change the site settings within Google Search. It should be noted that there is a maximum number of users per property.
You will need to let Google know if you are targeting specific countries with your entire site, or even just specific portions of the website.
Take your time to read and understand the webmaster guidelines. You should make sure to follow best practices that will enable Google to crawl and index your web pages and then rank them as needed—as long as you are not violating any of the quality guidelines.
As an option, you can submit a sitemap as well as a robots.txt file to help Google to understand which pages on your website should or should not be crawled.
Finally, you will need to learn how to monitor your website and search results within the Search Console. If the website has been designed well, you will not have to check on this data very often, and many times Google will notify the website owner if there is ever a problem.
Adding a Website Property
In order to add a website property to your search console, you will need to do the following:
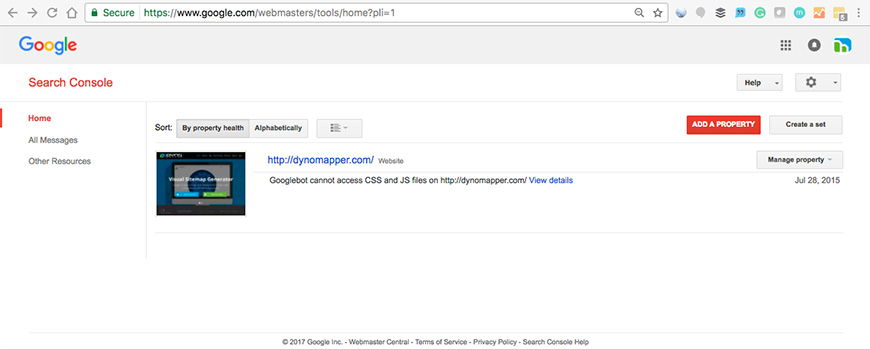
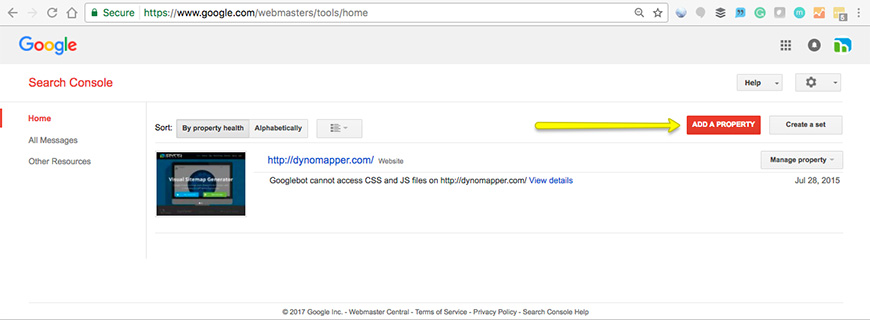
Within the home page of the Search Console, select Add a Property and type in the URL of the website or portion of the website that you would like the data for. You should specify the URL exactly how it is in the browser, including any final / marks. Select Continue in order to open the Site Verification page.
You will need to select your preferred verification method that will prove that you are the owner of the website by following the instructions on that page.
If your website is one that supports more than one protocol (http and https), each of these will have to be added as a separate website. Also, if you support more than one domain, each one has to be added as a separate website.
Verifying Website Ownership
Verification is when you prove that you are the owner of a website or application that you claim to own. Ownership needs to be confirmed because once it has been verified, you will have access to private data from Google Search, as well as have control over how Google Search crawls the website.
The term “property” in Search Console refers to a website or application that you own. You are able to request actions on the property like requesting a crawl, or viewing the data for the property, like crawling errors or statistics.
Verification will associate a user with a property—each Search Console property will need at least one verified owner. Any website or app can be added as a property in Search Console, but they can't be used until the ownership has been verified.
To verify a website, you will either add a new website, or Manage an existing property from the Search Console home page. You will need to choose one of the verification methods and follow the instructions. Not all properties will be able to use all of the verification methods—the page will list the methods that are recommended for your website. Several persons can add and verify websites separately, using either the same or other methods. If the same method is used, make sure that you are not overwriting the verification of other owners.
Google will check validation of verification periodically. If the verification cannot be confirmed, the permissions for that property will expire eventually. For a property, if all verified owners expire, all owners, users, and associates will lose access to the Search Console property. Note: even if there is a gap in owner verification, there will not be a gap in data collection.
To change the verification method, on the Search Console home page, you will select the property that you want. Select the gear icon, and then select Users & Property Owners. Select Manage property owners, and then Verify using a different method. You will now verify the property using the new method.
The most common errors in verification are: connection to the server timing out, too many redirections for the download request, error looking for the website's domain, invalid response from the server, there is an internal error, and Google was not able to connect to the server. Many of these errors are caused by a problem with the server.
In order to receive data for an app, you must add the property to Google's Search Console account, and then verify that you are the owner of the app. There are two ways to verify an app; one if you have the management rights on Google Play for the app, and one if you do not. If you do not have management rights through Google Play, you will need to ask the owner of the verified app property to add you as either an owner or a user to the application property.
Manage Owners, Users, and Permissions
Owners of a property have total control within the Search Console. They will be able to add and remove users, edit settings, view all data, and use all of the tools. The two types of owners (verified and delegated), though there is no visible distinction within the Search Console. A property has to have at least one verified owner, or else no users will be able to access the property. A verified owner will verify their ownership of the property, and all owners that have been added by a verified owner via Search Console will be delegated owners. Delegated owners will never have verified their ownership of the property, and can add more delegated owners.
Users are able to view all of the data while taking some of the actions, but are not able to add more users—a user has to be added by an owner. A full owner has the rights to most data and can take some actions, while a restricted user has only simple viewing rights for most of the data.
An associate is a Google property that is associated with a website via the Search Console. Someone can request to be an associate with a website through the Search Console, and they will be granted the abilities that are specific to the type of thing they are associated with. For instance, associated with a mobile application with a website will tell Google Search to show the results that are linked to that point of the app rather than the website when it is appropriate.
Grouping Properties into Sets
It is possible to group up to 200 properties into one single collective property, known as a property set. This property set is capable of containing properties of any other type, except other sets. A property set will show all of the data for each member property. A property set will appear in the list of properties within the account. These are the basic rules about property sets:
- You cannot add a set as a member of another set, but you are able to add any other type of property that has been verified.
- You have to be a verified user (or something greater) on all set members if you want to have access to the set.
- You are able to add only verified properties from your own account to a set.
- If you lose access or verification to any property within a set, the whole set will then become inaccessible to you. Even so, data will still be collected for the set, and once you are verified you will be able to see the data again for the sets.
- It is possible for a set to have a single owner and no users.
- Sets will support a portion of the reports and tools that are available to other property types.
- Data of sets can only be viewed as an aggregate, and when you are viewing impression data for a set that contains multiple properties you will be shown the total impressions for all. If you want to see total impressions for just one of the properties, it will need to be switched within the Search Console.
Creating a Property Set
When a new property set is being created, remember that you have to be (at the very least) a verified restricted user for all of the member properties within the set. There is a limit of only 200 properties within a set.
You will need to click on Create a set within the Search Console home page. You will have the option to modify the name of a new set. You will also be able to add members to the set from an existing verified property within the account. Save the new set, and clicking cancel will not keep the set from being created. In order to delete the set, you will have to go back to the home page and then delete it from the property list. It may take up to a few days to see the data for the new set, once the changes are applied.
Editing a Property Set
If you would like to add or remove set members, change a name or other attributes, you will locate the set in the Search Console home page, and then click on Manage set, then Edit set. When a member is added or removed from a property set, the data from the member will not be edited within the history of the data.
Deleting a Property Set
It is very easy to delete a property set. Locate the set within the Search Console Home page. Select Manage set, and then Delete set.


Related Articles
- 4 Easy Ways to Search a Website for a Specific Word
- Should You Use Nofollow Links For SEO
- White Hat SEO vs. Black Hat SEO
- Redirection and the Impact on SEO Rankings
- 12 Page Speed Best Practices to Follow for SEO
- All About the Robots.txt File
- Web Accessibility and Search Engine Optimization (SEO)
- What is Speakable and How Can it Help Voice Search SEO?
- How to Prevent Blacklisting When Scraping
- JavaScript (JS) and Search Engine Optimization (SEO)
- What is Negative SEO, and How to Defend Yourself
- The History of SEO and Search Engines
- How to Build a Website for Search Engine Optimization
- Duplicate Content Issues Hurting Your SEO
- Top 10 Backlink Checker Tools for SEO
- Why Does SEO Take So Long for Search Engine Success?
- Top 10 Content Planning Tools for Content Marketing
- Seo Copywriting: How to Write for Search Engine Optimization
- Top 15 Tools for Measuring Website or Application Speed
- Top 25 SEO Tips for eCommerce Websites
- Top 15 Plagiarism Tools for Finding Duplicate Content
- Top 25 SEO Blogs to Stay Up-to-date with Search
- The Best Content Management System (CMS) for SEO
- Social Media & SEO: Why Your SEO Strategy Needs To Include Social
- HTTP or HTTPS? The SEO Impact of Using SSL Certificates
- 35 Amazing Web Analytics Tools that Rival Google Analytics
- 25 Ways to Build Backlinks to Your Website for Free
- What Is Structured Data and Why You Need It for SEO
- 60 Innovative Website Crawlers for Content Monitoring
- Voice Search: How Our Voices Mold the Future of SEO
- Crawl Budgets. How to Stay in Google's Good Graces
- 30 Awesome Keyword Ranking Tools for SEO
- 43 Amazing Websites to Learn SEO Online
- Pagination or Infinite Scroll for SEO?
- CMS Plugins for Google AMP (Accelerated Mobile Pages)
- Are Keywords Still Important for SEO?
- Do Sitemaps Help SEO? The Importance of Sitemaps for SEO
- Getting Started with Search Engine Optimization
- SEO vs. PPC: Which One Should You Choose?
- How to Make Your Content Search-Friendly
Create Visual Sitemaps
Create, edit, customize, and share visual sitemaps integrated with Google Analytics for easy discovery, planning, and collaboration.
Popular Tags
Search Engine Optimization SEO Accessibility Testing Create Sitemaps Sitemaps UX User Experience Sitemap Generator Content Audit Visual Sitemap Generator
Get Started with DYNO Mapper
Join thousands of professionals using the most advanced visual sitemap tool to simplify discovery, IA, and content planning.
👉 Start Your Free Trial — No credit card required.