User Guide
Table of Contents
-
Introduction to the Sitemap Generator
-
Introduction to the Content Inventory Tool
-
Introduction to using Google Analytics
-
Introduction to Sitemap Collaboration
-
Account Management
1. Introduction to the Sitemap Generator
A. How to Create Visual Sitemaps
Video Tutorials
Visit our Video Tutorials page about how to use DYNO Mapper or watch on our YouTube and Vimeo channels!
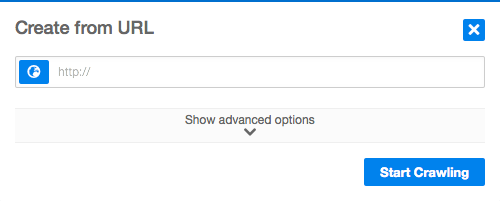
Option 1: Create from URL
Enter the base URL that you would like to create a visual sitemap for including the http:// or https:// located at the beginning of the url.
Option 2: Create from XML
Create visual sitemaps from xml files that are located on your computer or online via a url.
Option 3:Create from Scratch
Create visual sitemaps using the DYNO Mapper editor to manually add, remove, edit, and set categories of pages without the need to crawl urls or import xmls.
Option 4: Create from Existing
Create visual sitemaps from sitemaps previously created within your DYNO Mapper account.
Advanced Options
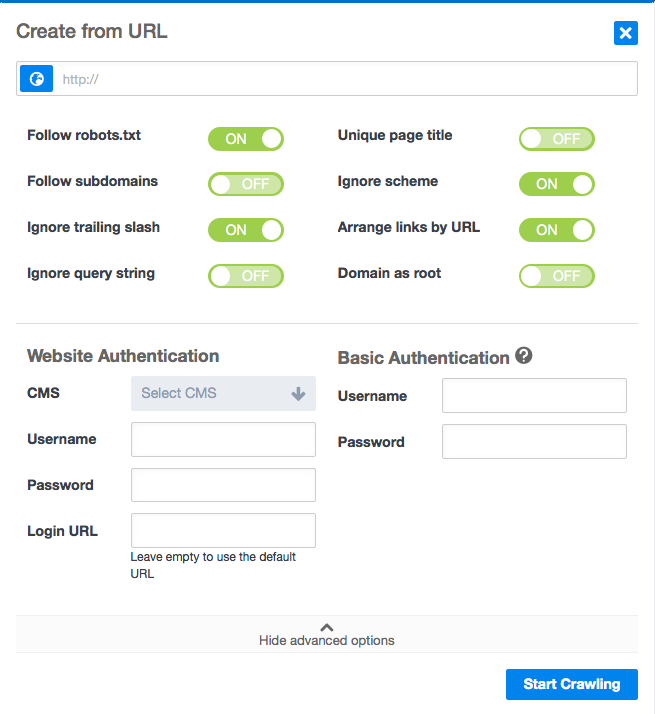
- Follow robots.txt - The robots.txt file allows websites to indicate to web robots like Google robot and DYNO Mapper that you would like them to ignore certain pages. The preference in DYNO Mapper is on by default and can be switched off in the Create from URL advanced options. The robots.txt file name must be written in lowercase and placed in the root directory of your website and follow The Robots Exclusion Protocol - link to http://www.robotstxt.org/robotstxt.html
- Follow subdomains - A sub-domain is a domain that is part of a larger domain. For example, north.example.com and south.example.com are subdomains of the example.com domain.
- Ignore trailing slash - If website code is hand written, it may not be consistent and also contain certain problems even though the page will still appear to work properly in a web browser. This option will allow the DYNO Mapper to be more forgiving and overlook problems like a web browser does if on is selected or be less forgiving if no is selected.
- Ignore query string - A querystring is info within a url that follows a '?' - for example www.example.com/index.html?thisis=thequerystring. The option is important if you have dynamic sections within your website like calendars. Dynamic sections within a website that use query strings can consist of many pages that you might want to omit from your sitemap.
- Unique page title - If your website contains pages that each have a unique title, selecting yes for this option will give you a very accurate crawl. Some content management systems can refer to the same page by quite a few different urls which causes duplicates within your visual sitemap.
- Ignore scheme - Some websites have duplicate pages prepresented because they allow multiple schemes of an individual page. For example, if you do not ignore scheme of www.example.com - the pages http://www.example.com & https://www.example.com would be considered two different pages.
- Arrange links by URL - If you would like DYNO Mapper to arrange your sitemap based on the parent/child relationship used in the url, keep the option on.
- Domain as root - If you are crawling a sub-domian, this setting lets you set that sub-domain as the root of the sitemap tree.
- Website Authentication - Use website authentication if you would like to include private front end pages within your sitemap from popular CMS systems. If your favorite CMS system is not in the list, please send us an email to inquire if we can add it CMS systems that we support.
- Basic Authentication - Use HTTP Basic authentication for authentication that is static, standard HTTP headers.
B. Editing Sitemaps
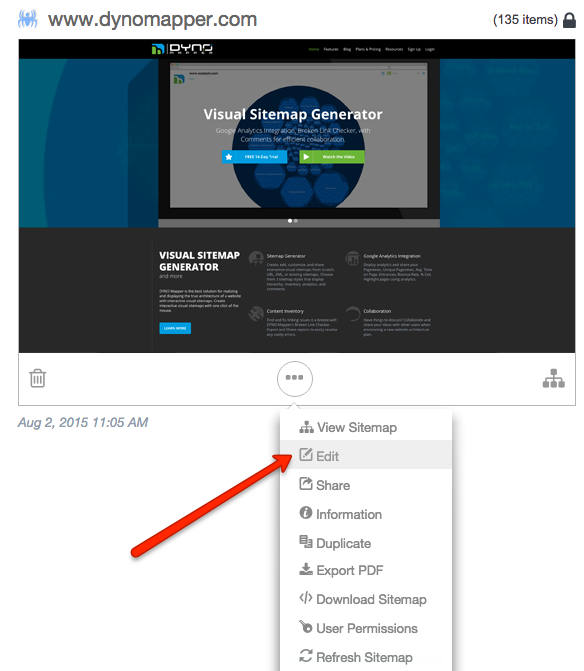
After you have created a sitemap, click the edit button located under the title of your sitemap in the list. Another edit button is located for your convenience in the upper right hand corner of your sitemap. Only logged in users will be able to see the edit button located on your sitemap. Shared viewers of the sitemap will not be able to see or use the edit button.
Grid View
List View

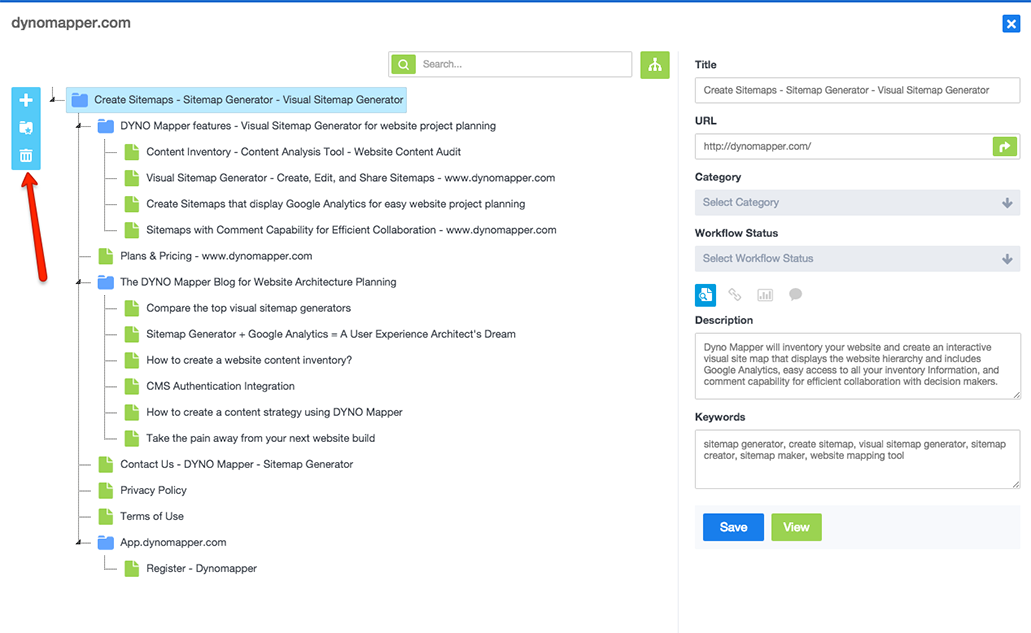
Edit your sitemap using the tools located on the left side of the editor. Drag and drop pages to position the hierarchy.
Editor Tools:
 Add Page
 Delete Page
 Assign Category
 Preview Sitemap
C. Customize Sitemaps
Custom Logo
In the sitemap list, click the DYNO Mapper logo to upload a custom logo for each sitemap. The DYNO Mapper logo will show as a default until a new logo is uploaded.

Edit Sitemap Colors
Click the Color icon in the sitemap tool bar.
![]()
Select a preset
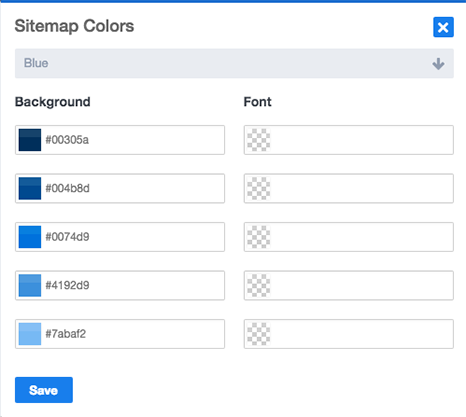
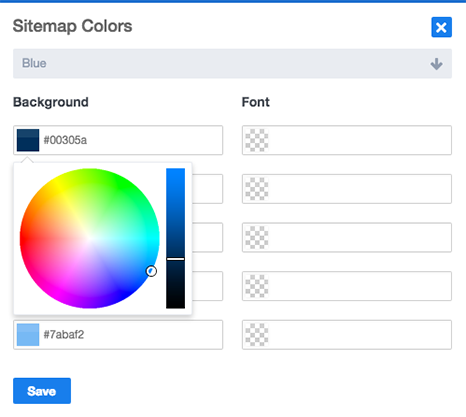
or choose custom colors to change the look of your sitemap.
Edit Sitemap Style
Choose from 4 available sitemap styles in the sitemap tool bar.
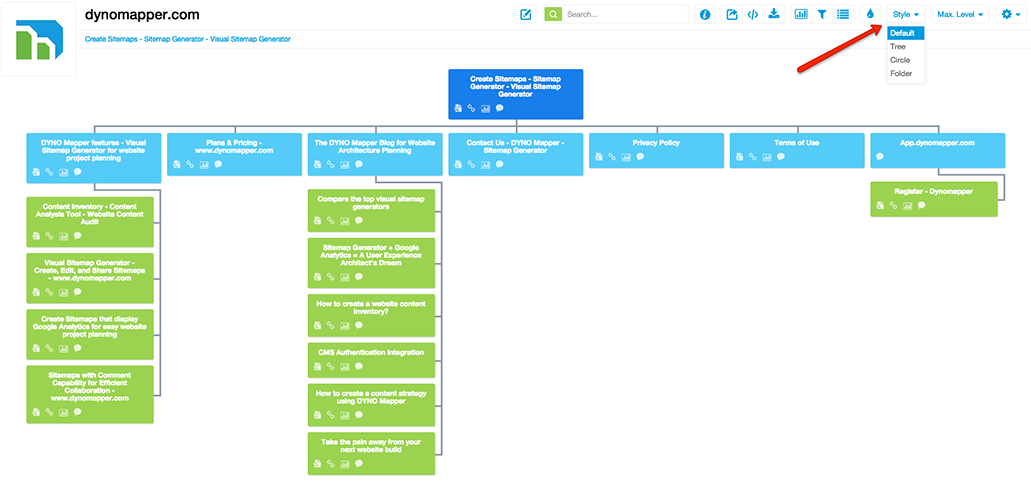
Choose from the following styles:
Default Style
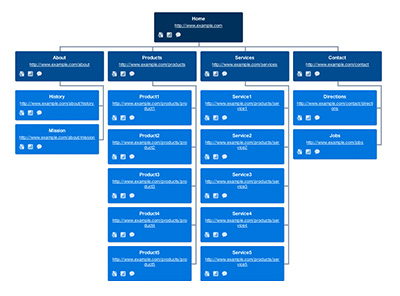
Tree Style
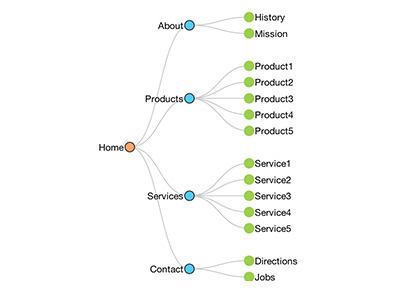
Circle Style

Show Url
Each sitemap has the ability to show a optional URL on each page tab of the sitemap.
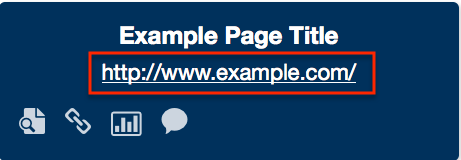
You can turn this optional information on using the sitemap toolbar.
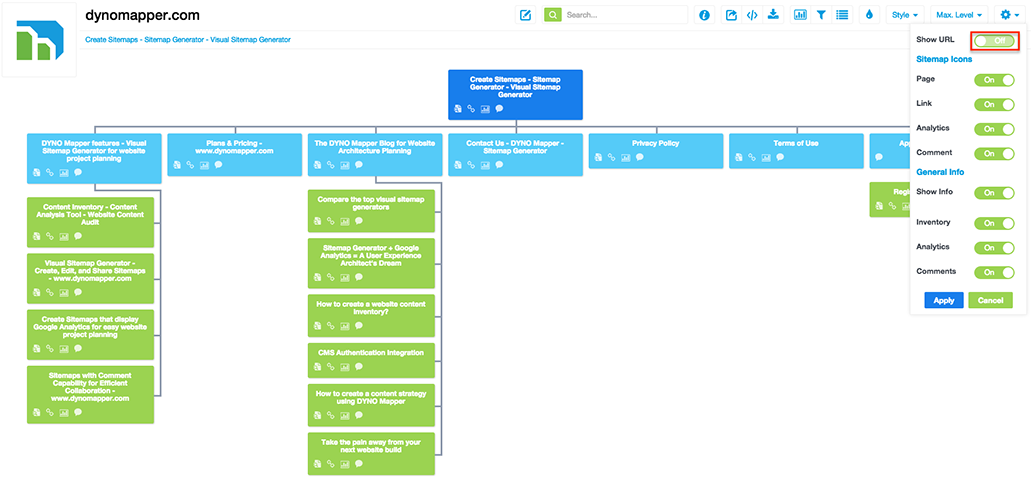
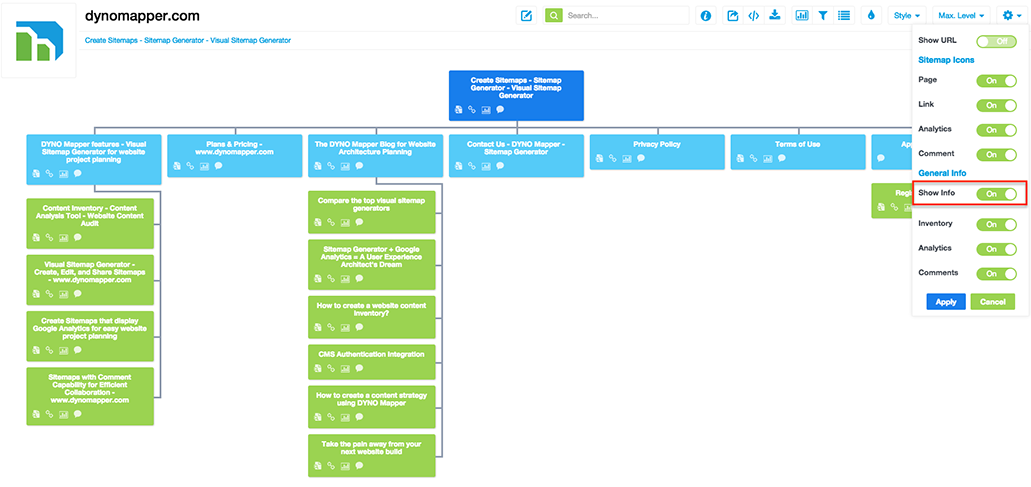
Show General Information
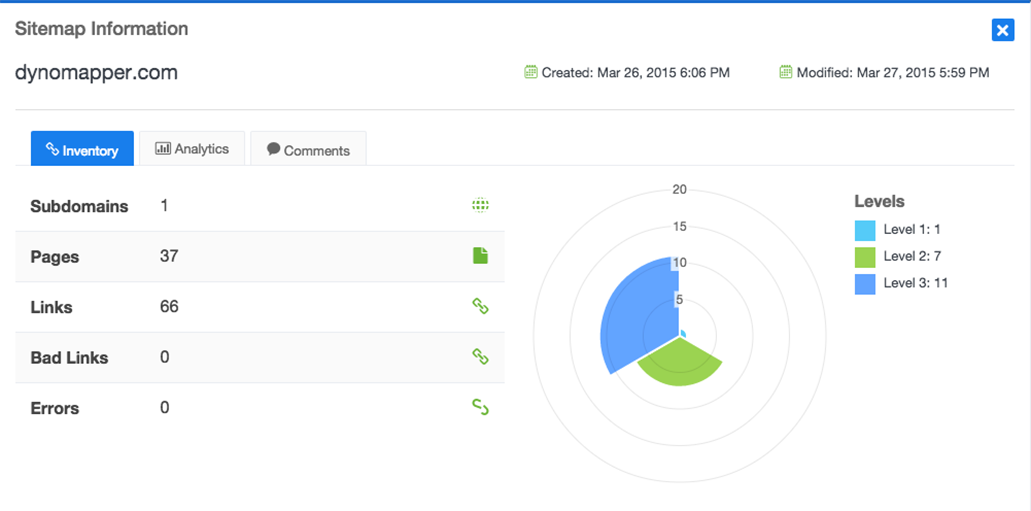
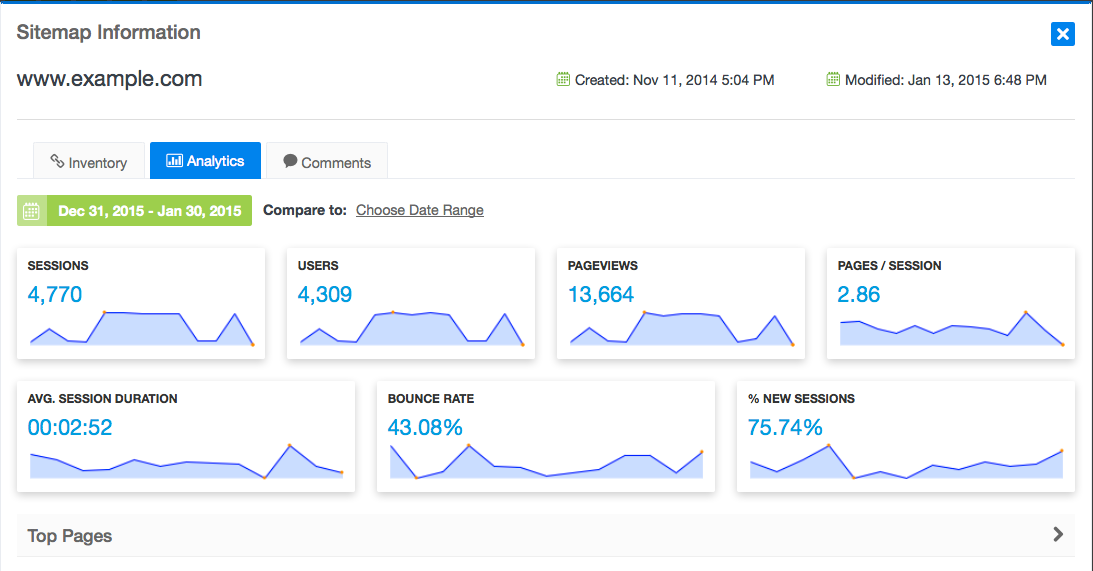
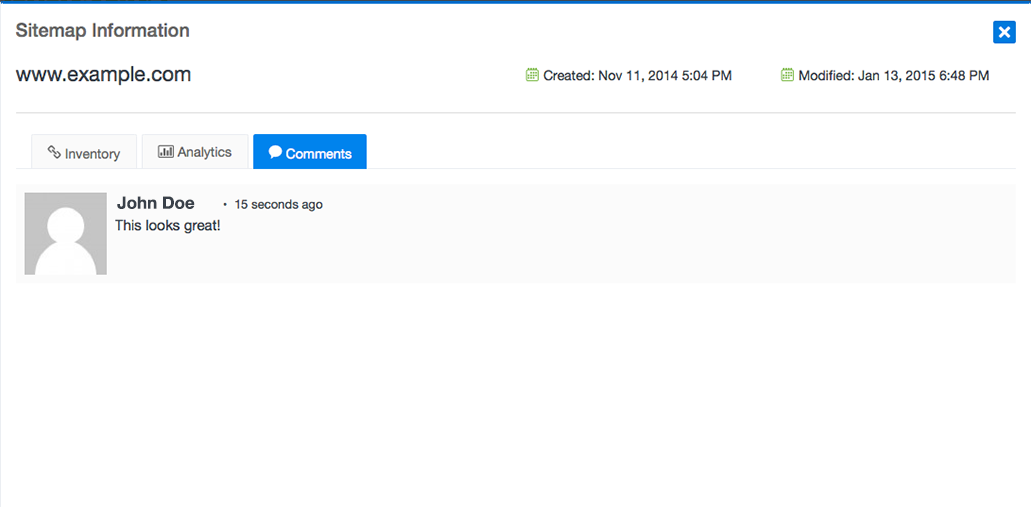
Display general information about each website using the show info option in the sitemap editor. The General Information pop can be accessed within the list of sitemaps or on each sitemap in the upper right hand corner.
Inventory Information
Analytics Information
Collaboration Information
Max Level
Use the Max Level option to adjust the number of levels shown by your sitemap.
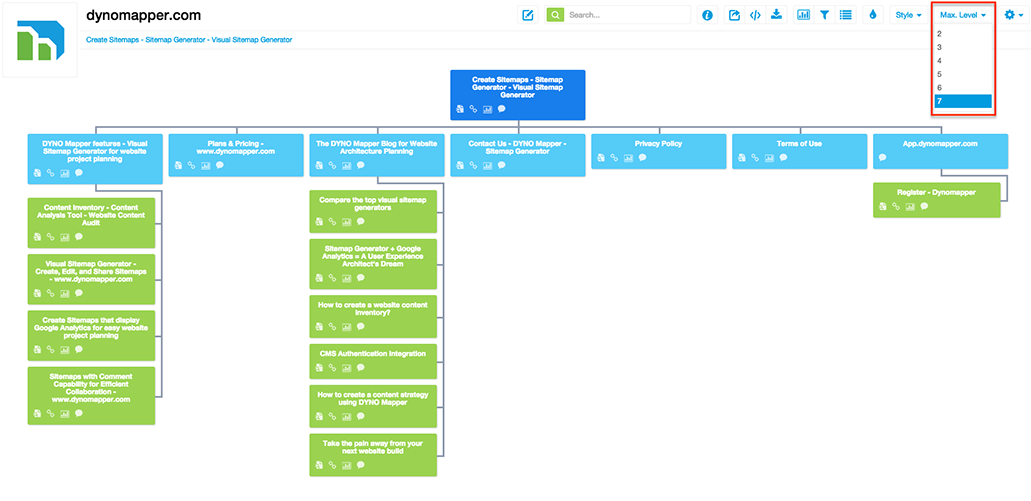
Setting a maximum level will create sub-pages within your sitemap that can be accessed by clicking the arrow that appears on the sitemap.

Sitemap Icons
Each page of your sitemap comes with 4 optional icons for viewing the live page, analytics, page inventory, and comments.
![]()
- View: Click this icon to view the live website page
- Analytics: Click this icon to view page analytics
- Inventory: Click the icon to view page inventory
- Comments: click this icon to comment on a page
Sitemap Icons can be controlled globally using the tool bar.
![]()
D. Share Sitemaps
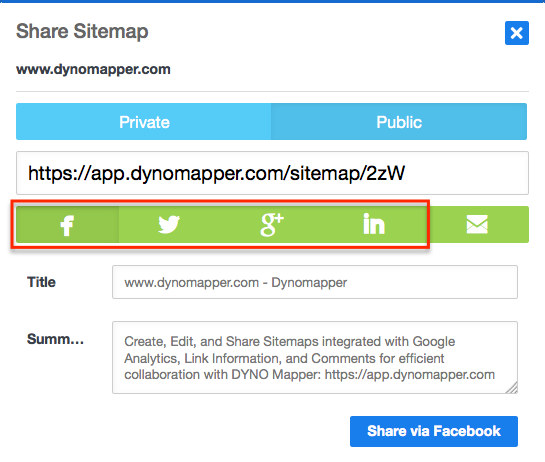
Sitemaps can be shared with other users that do not have DYNO Mapper account by clicking the Share icon in the sitemap lists.
![]()
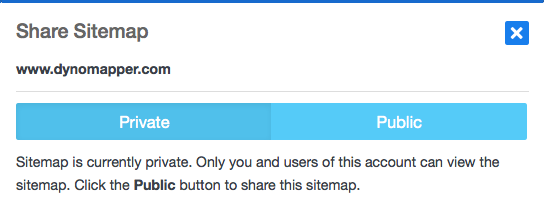
Sitemap is private by default. Only you and users of this account can view the sitemap when set to default. Click the Public button to share this sitemap publicly.
Private or Public Sitemaps
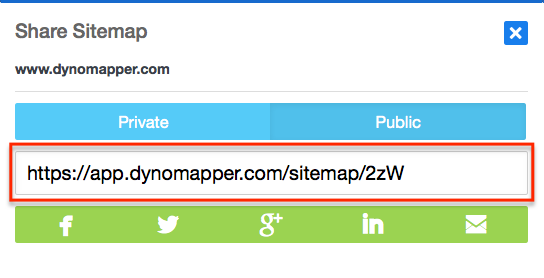
Share URL
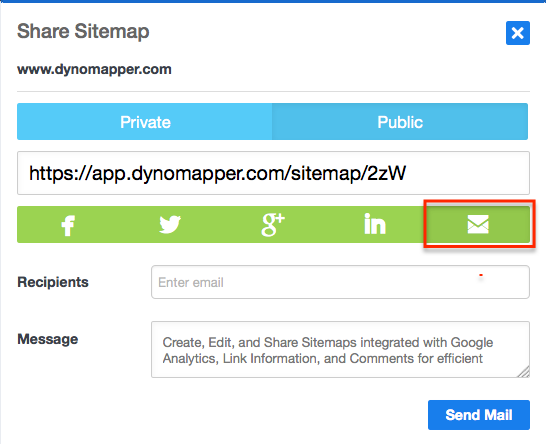
Share Sitemaps via Email
Share on Social Media
2. Introduction to the Content Inventory Tool
A. Create Website Inventory
Create a website inventory by clicking Create from URL in the left side menu.
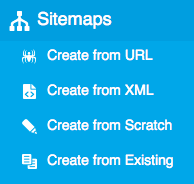
Create from URL
Enter the base URL that you would like to create a visual sitemap for including the http:// or https:// located at the beginning of the url.

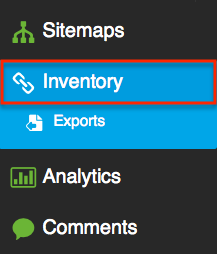
After DYNO Mapper is finished creating your sitemap, your inventory can be accessed by clicking the Inventory link in the left side menu.
In the inventory list, select the website that you would like to view. This list will display the number of subdomains, pages, links, bad links, and errors. Click the Details button to view your inventory detail.

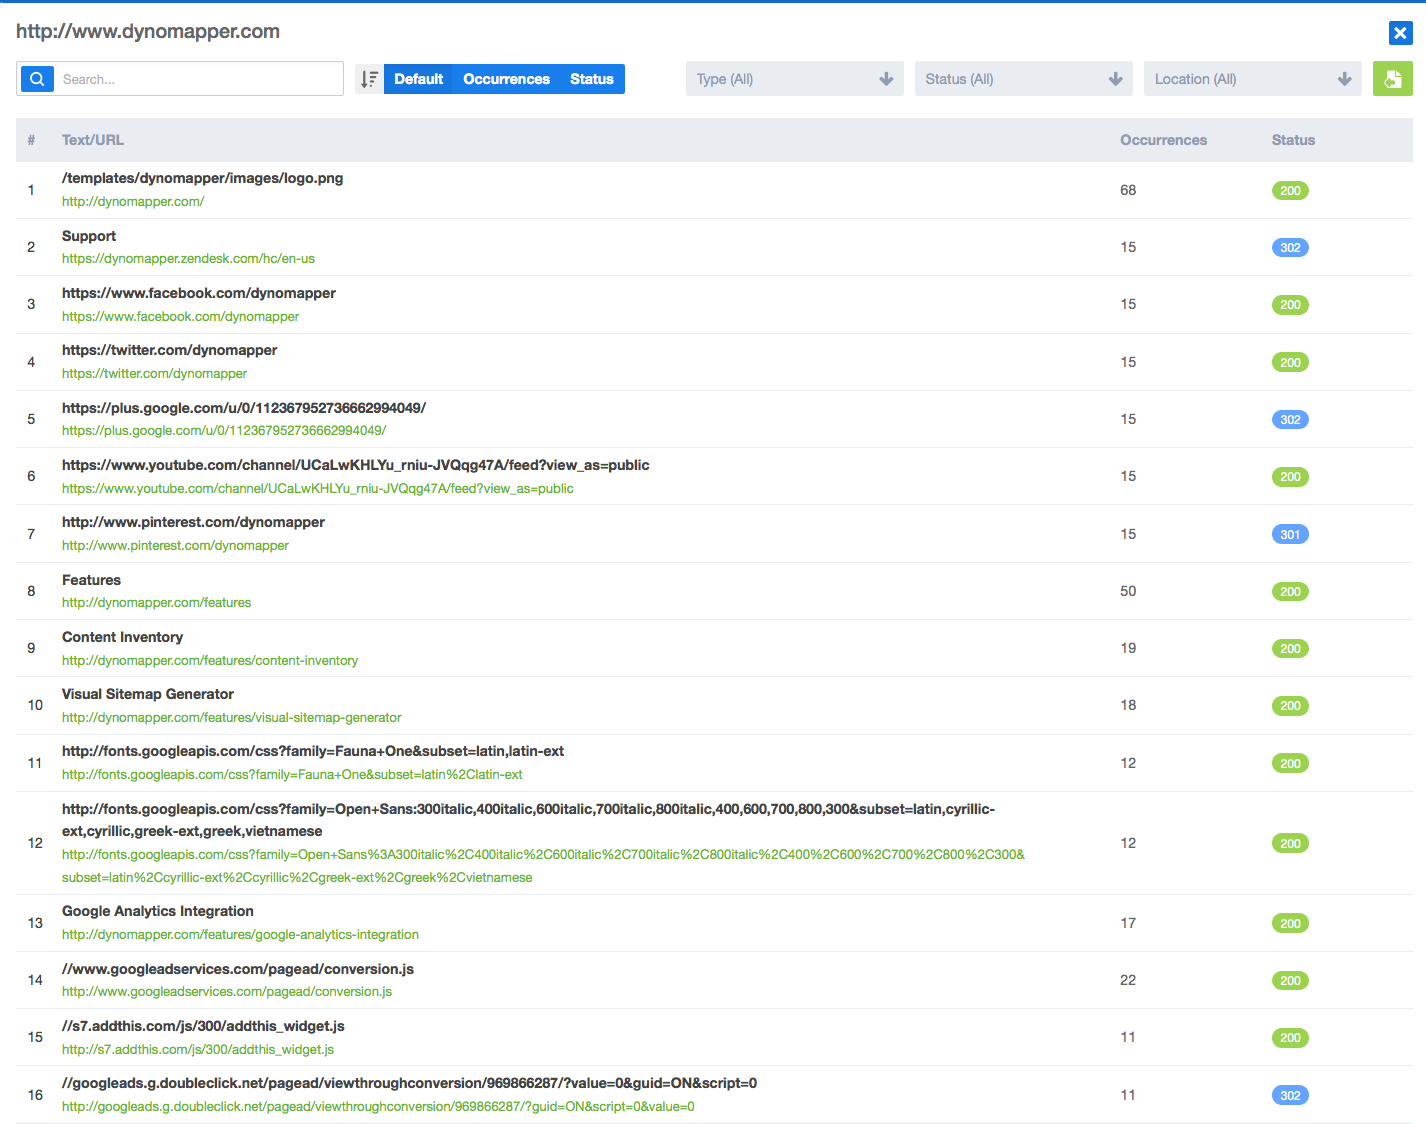
After clicking the Details button, you will enter the inventory detail.
B. Search
Search page titles and urls using the search bar. Enter your keyword and press enter.

C. Sort
Sort pages by Default, Occurrences, and Status

D. Filtering
Filter inventory items using the Type, Status, and Location filters.

Filter by Type
- Page
- Image
- File
Filter by Status
- Ok
- Bad Links
- Redirects
- Unknown Error
Filter by Location
- Internal
- External
E. Export
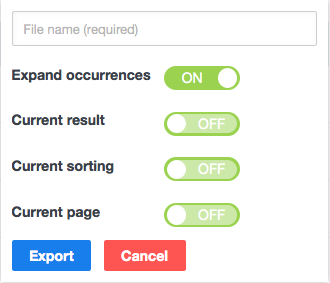
Inventory lists can be exported to .csv files which are Microsoft Excel compatible. Click the export icon located in the upper right hand corner of the inventory detail page to export your website inventory.

Name your export file and select your desired export options.
After completing your export, save your file by clicking Inventory/Exports in the left side menu.
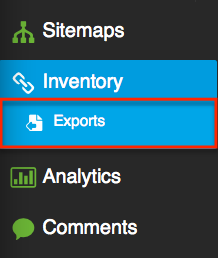
When you click Exports, a window will open up with your file for download.
3. Introduction to using Google Analytics
A. Step 1: Add Account
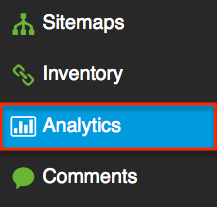
Click the Analytics menu item in the left side menu
Click the + icon in the upper right corner

Click + Add Account
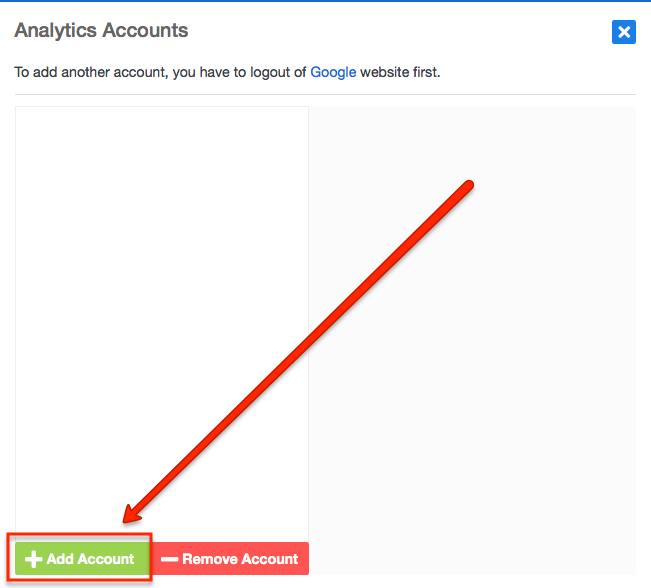
Sign into your Google Account
Click the Accept button in the Google pop-up Window
You will see your Google Analytics profile appear in the left hand column of the pop-up window
Repeat steps to add more accounts
B. Step 2: Map Profiles
If you are not there already, click the Analytics menu item in the left side menu

Click the Map Sitemap to Profiles Icon in the top right hand corner

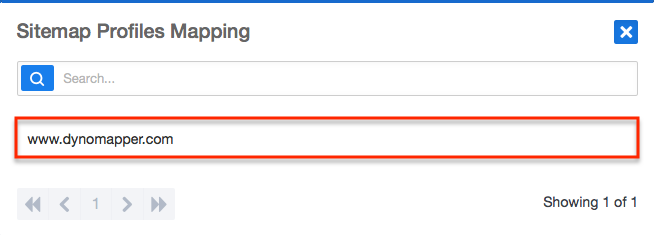
Find the Google Analytics Account that you added - then select by clicking the name in the list.
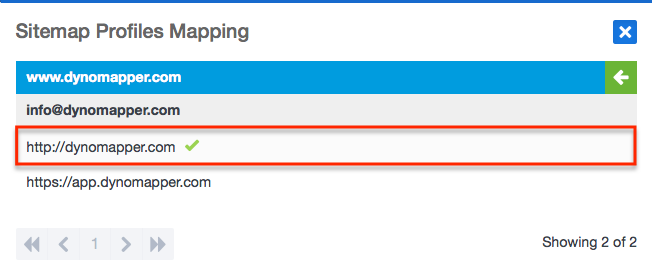
Select the Google Analytics Profile of the website that you would like to display analytic data.
C. Analytics Dashboard
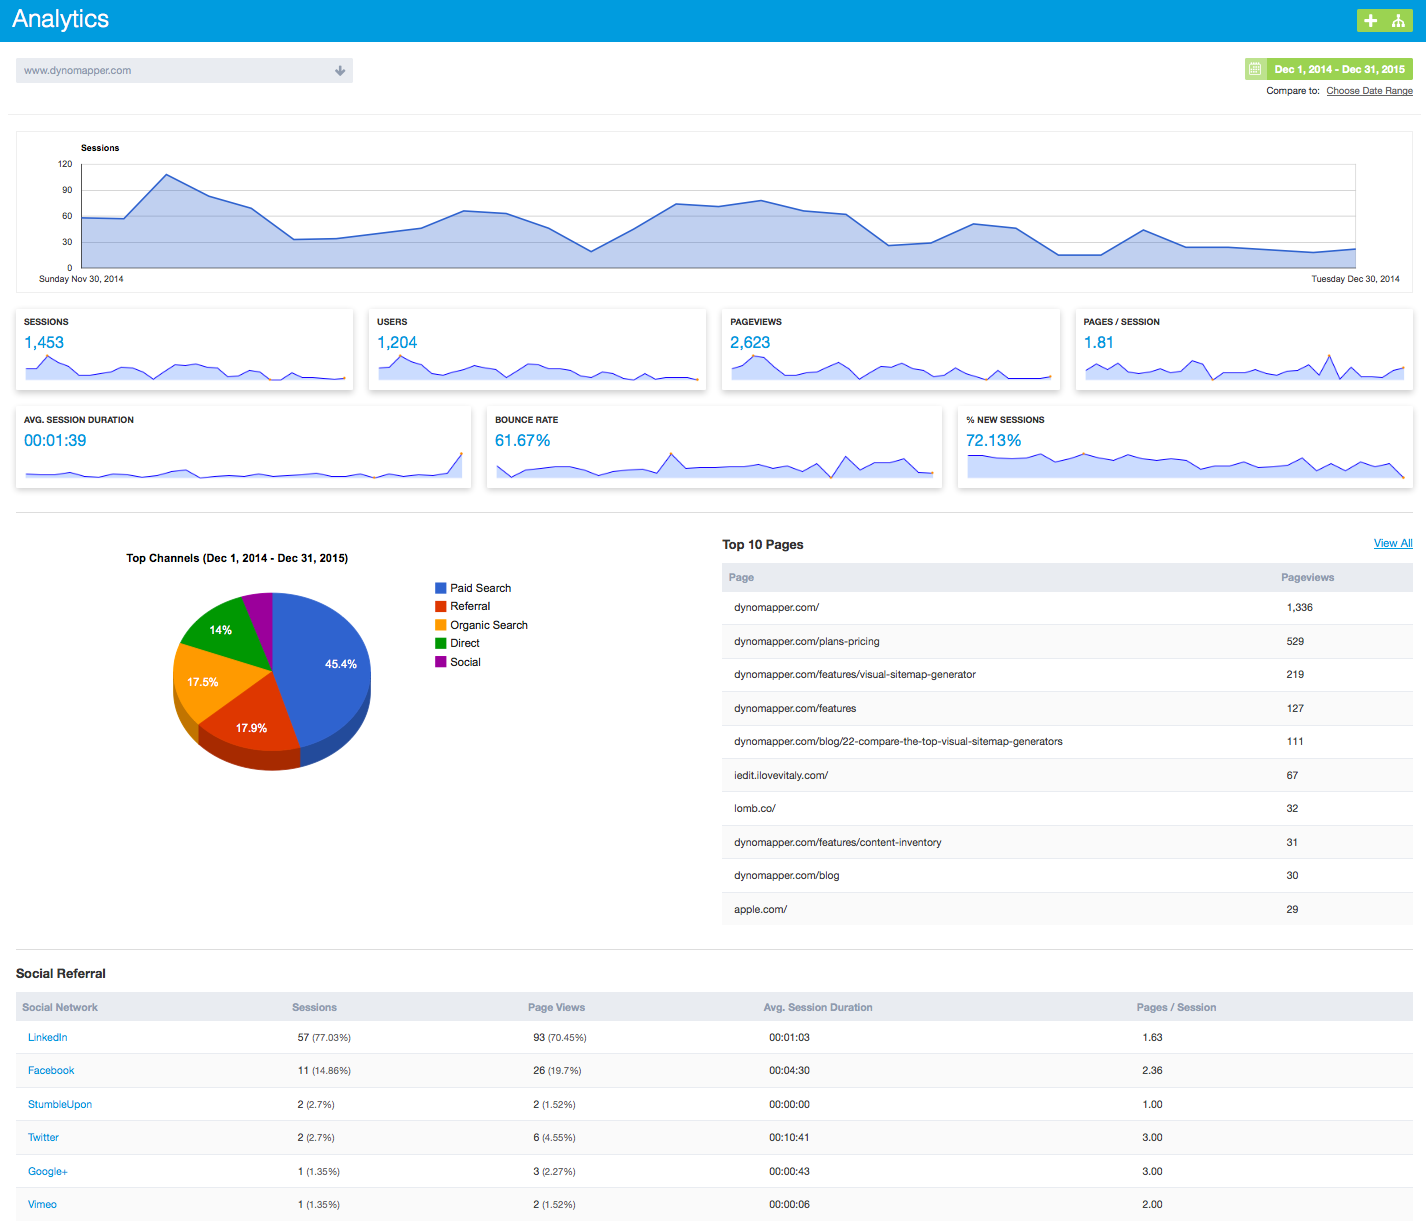
After you have completed step 1 and 2 your analytics will be displayed in your analytics dashboard. Refresh your browser and select sitemap in the drop down.

After you have selected your website in the dropdown your analytics will show.
D. Sitemap Analytics
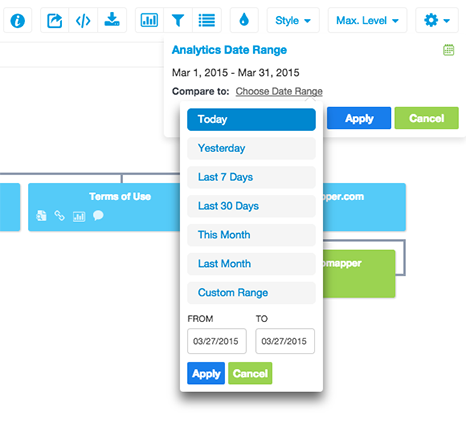
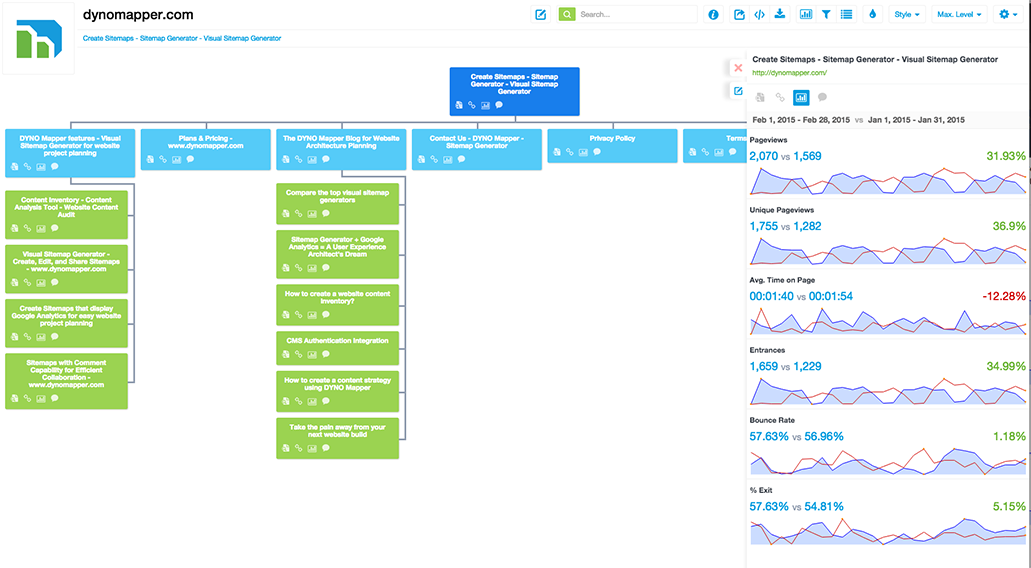
After you have added your analytics account and mapped your analytics profile to your sitemap then your analytics data will be displayed within your sitemap. Select the date range you would like to display.
Click the current date range and select your desire range. If you would like to compare dates, then do the same by selecting the “Choose Date Range” and input the dates you would like to compare.
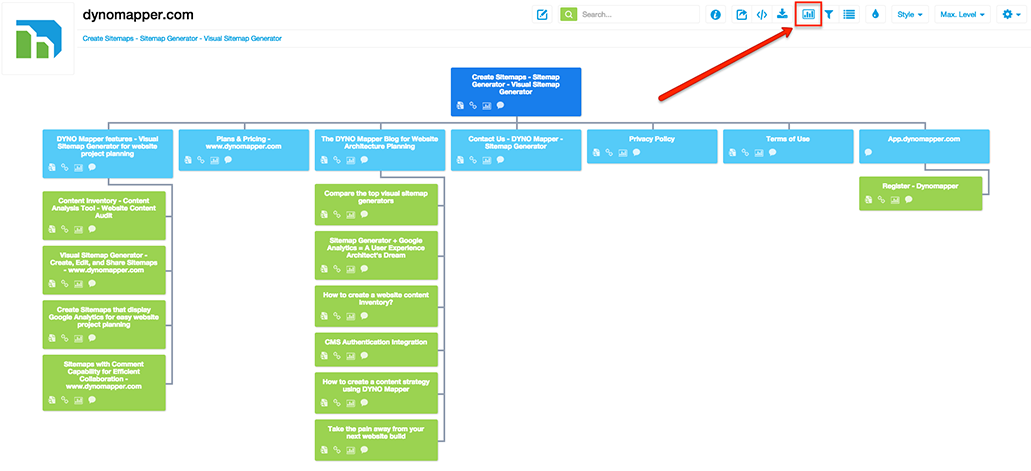
Click the sitemap icon on each page to view the individual page data.
4. Introduction to Sitemap Collaboration
A. Global Comment Notifications
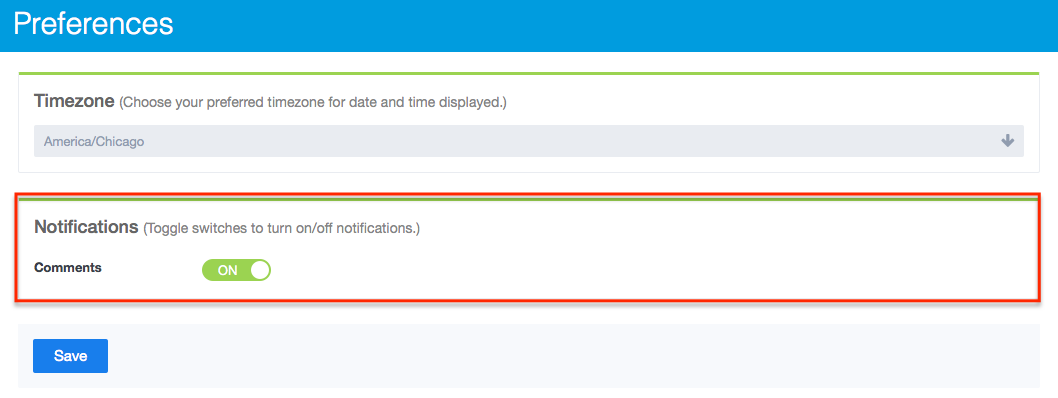
If you would like to receive notifications for all comments in your DYNO Mapper account, go to the user menu in the upper right corner and select Preferences. In the Preferences window turn comments ON or OFF.
B. Individual Sitemap Notifications
Select the Comment menu item in the right hand side of the menu.
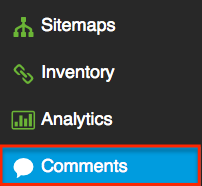
Click the gear icon next to the sitemap that you would like to setup notifications for.

5. Account Management
A. How to Cancel?
In the top right corner, Click the My account in the user menu. Click “Update Subscription”. If you wish to terminate your account, just click the link below. Cancel Account and Subscription
B. Upgrade / Downgrade
In the top right corner, Click the My account in the user menu. Click “Upgrade/Downgrade Plan”. Select the new plan of your choosing.
C. Adding Users
In the top right corner, Click the My account in the user menu. Click “Users”. Send an Invite Email to the user(s) that you would like to add.
Get Started with DYNO Mapper
Join thousands of professionals using the most advanced visual sitemap tool to simplify discovery, IA, and content planning.
👉 Start Your Free Trial — No credit card required.

